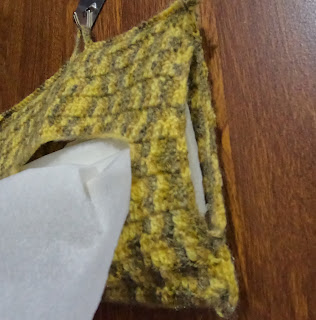
Hi friends, assalamu alaikkum. I wanted to make something useful for my home. The first thing that striked my mind was a tissue holder. I use to search each time when I needed a tissue. So I felt, why not make a hanging tissue holder with crochet. And yes, it was really useful. It would be really helpful too.
Without wasting time, let's get started.
Step 1 : Slipknot, followed by ch 50(49+1). This depends upon the size of the tissue you have. As well you need to leave gap on sizes. So 50 chains was sufficient for me.
Step 2 : 1 SC on the back bump on the 2nd chain from hook till end of row.
Step 3 : 1 DC on each stitch for 19 rows.
Step 4 : ch 1, cut off yarn & sew ends.
Step 5 : Repeat steps 1 to 3 for 9 rows
Step 6 : do 1 DC for 7 stitches.
Step 7 : ch 35.
Step 8 : 1 Dc on the last 7 stitches.
Step 9 : 1 Dc on each stitch for 9 more rows.
Step 10 : Now do slst together , the 2 pieces.
Step 11 : SC on sides., leave some opening for adding tissue on the sides of both sides.
Step 12 : Add sticks on top and bottom and sew.
Step 13 : Do 23 SCs on the top, followed by ch 11.
Step 14 : skip 2 stitches and start doing 1 SC on the remaining stitches.
Step 15 : Repeat 1 row of SCs .
Step 16 : Ch 1, cut off yarn & sew.
Step 17 : Add the tissues inside.
Step 18 : Your hanging tissue holder is ready!!!


No comments:
Hi friends, thank you for reaching me. Follow me for more ideas. Subscribe my YouTube channel.